
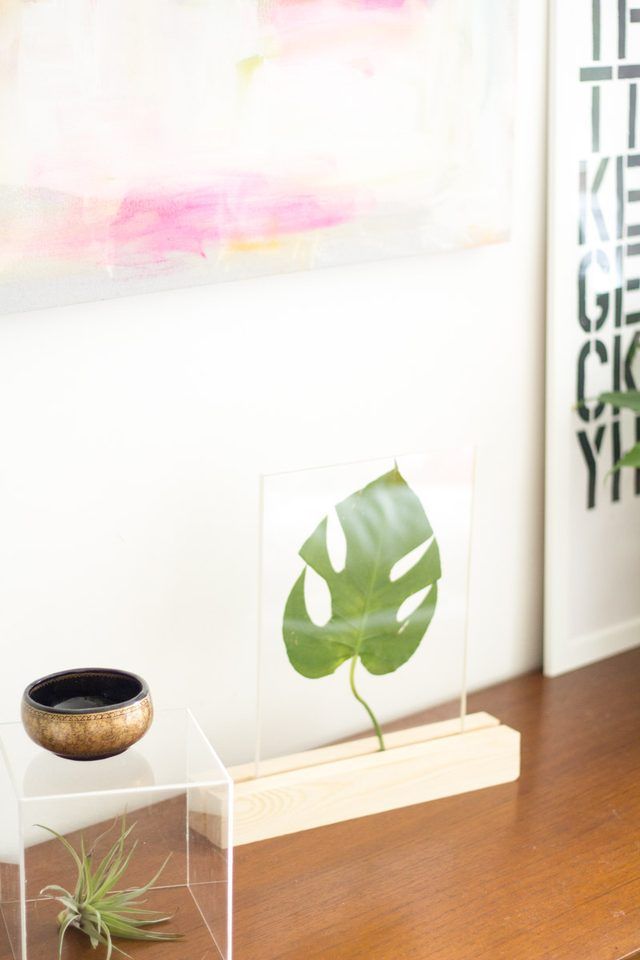
Easy DIY Framed Leaf Home Accessory Using Plexiglass sheet
This simple plexiglass décor is a great way to display pressed flora in a contemporary way. Use large leaves to fill the frame or create a collection of more delicate flowers and petals.
Plexiglass sheets or acrylic glass, is a transparent thermoplastic often used in sheet form as a lightweight or shatter-resistant alternative to glass. The same material can be used as a casting resin or in inks and coatings, among many other uses. The substance, like many thermoplastics, is often technically classified as a type of glass, hence it is commonly referred to as acrylic glass.
Things You'll Need
-
Plexiglass sheets (x2)
-
Pressed leaves
-
Cuboid/rectangular block shaped wood, 2 inches by 3 inches (x2)
-
Cuboid/rectangular block shaped wood, 1/8 inch by 1/2 inch (x1)
-
Saw
-
Strong glue
-
1/8-inch iron-on edge trim tape
-
Iron box
Step 1 - Be sure to press the leaves and flowers in advance. Once they are ready to use, cut the plexiglass sheets a little bigger than the size of the leaf or flower arrangement. Cut the larger wooden cuboid 4 inches longer than the length of the plexiglass sheet. You will need two pieces of the larger wooden cuboid piece and one length of the smaller, thinner wooden piece.
Step 2 - Peel back the protective plastic from the plexiglass sheets, be careful not to scratch the surface. Sandwich your leaves or flowers between the two layers of plexiglass sheets. Make sure there are no rogue hairs or dirt trapped between the layers with your foliage and then line up the edges.
Step 3 - Put the iron-on edging tape all around your plexiglass sheets to hold the sheets together. Press the iron box along the sheet keeping the edges lined up with the edges of the plexiglass sheets. Trim the excess of the edging tape and set aside.
Step 4 - Using strong adhesive, glue the smaller wooden piece in between the two larger wooden pieces that will be the base of the stand. Hold the base together and then leave until the adhesive is dry. At this point you could check that your plexiglass sheet sandwich slides into the gap easily. When your stand dries, slide the plexiglass frame into the base and display your new accessory in your home.
RingBinderDepot has a collection of plexiglass sheets in different sizes and thickness for a project like this and others. Head over to their for exciting discounts for first time shoppers.
Original source and more details: www.ehow.com